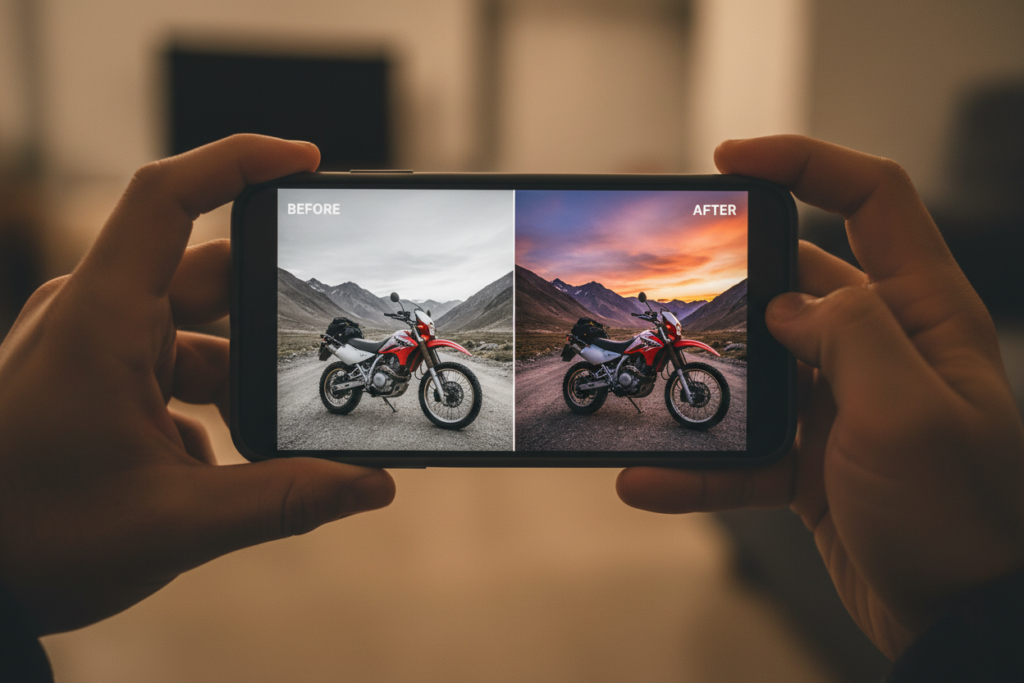
You’ve ridden a spectacular road, stopped at the perfect viewpoint, and taken fifty photos. Back at the guesthouse that evening you scroll through them and something is wrong — they look flat, underwhelming, and nothing like what you actually saw. The colours are muted, the sky is blown out, and the road that felt dramatic at 1,800 metres of elevation looks like any other tarmac. This is the gap that editing closes. Not by fabricating something that wasn’t there, but by recovering what the camera captured and the phone screen is failing to show you.
Editing motorcycle travel photos on mobile has become genuinely viable in the past few years. Processing power on current smartphones handles RAW files without compromise. OLED screens are colour-accurate enough for serious editing. And the workflow advantage of editing in the evening while the day is fresh — context intact, memory vivid — produces better results than a backlog of two thousand images waiting at a desktop at home. This guide covers the apps, the techniques, and the workflow that makes on-road photo editing work without excessive gear.
Why Mobile Editing Works for Motorcycle Travel Photography
The smartphone has become a complete creative tool for travel photography — shoot, edit, and share from a single device without carrying a laptop. For motorcycle touring specifically, where every gram of luggage is a decision, removing the laptop from the kit entirely while maintaining a serious photo workflow is a significant practical advantage.
The evening editing session fits naturally into the rhythm of a touring day. Thirty minutes at the guesthouse after dinner — culling the day’s shots, editing the keepers, backing up to cloud — keeps the photo workflow current and prevents the end-of-tour backlog that turns two weeks of riding into two months of editing at home. Editing while the day is fresh also produces better decisions: you remember which shot was the one that mattered, which location felt most significant, and which image deserves the extra ten minutes of careful adjustment.
Essential Apps for Editing Motorcycle Travel Photos
Lightroom Mobile — The Gold Standard
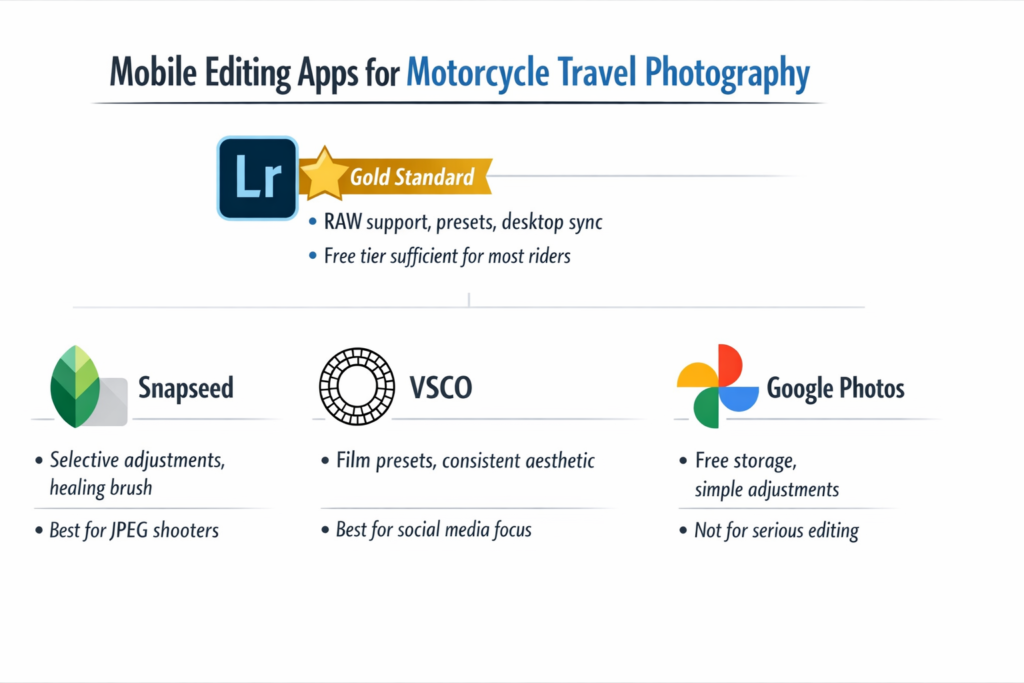
Lightroom Mobile is the first app to install for any serious editing motorcycle travel photo workflow. The free tier covers the majority of what most riders need — RAW file support, full manual controls, and the ability to create and apply presets across multiple images. The paid subscription adds desktop sync, AI masking tools, and unlimited cloud storage, which becomes relevant as a tour progresses and image volume grows.
RAW file support is the critical advantage and therfore comes only with the paid version. A RAW file retains far more tonal information than a JPEG — highlights that look completely blown in a JPEG can be recovered in a RAW edit, and shadow detail in dark canyon shots or under helmet brims pulls back cleanly. If your phone or camera shoots RAW, use it. The editing flexibility is not subtle.
Presets — saved combinations of editing settings applied with a single tap — are the most time-efficient tool in a touring editing workflow. Creating two or three presets calibrated to your shooting conditions at the start of a tour means batch-applying a consistent look to an entire day’s images takes minutes rather than hours.
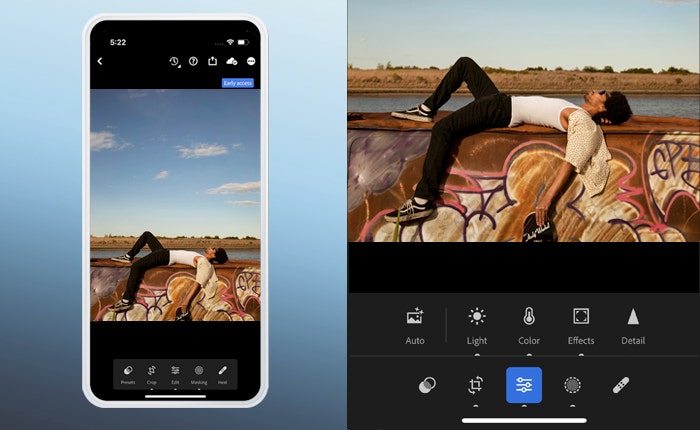
Snapseed — The Free Alternative
Snapseed is Google’s free editing app and covers most editing needs without a subscription. The selective adjustment tool — painting an adjustment onto a specific area of the image rather than applying it globally — is genuinely useful for motorcycle travel photography: lifting shadow detail under a helmet brim without brightening the whole image, or darkening a blown-out sky without affecting the foreground.
The healing brush removes distracting elements — road signs, parked cars, litter — with reasonable effectiveness on uncomplicated backgrounds. Perspective correction fixes leaning horizons, which appear in almost every motorcycle travel shot taken quickly from a moving or tilted position. For riders who shoot JPEG rather than RAW, Snapseed is entirely capable of producing professional results.
VSCO — Consistency and Style
VSCO’s film-inspired presets produce a consistent aesthetic that works well for motorcycle travel photography — slightly desaturated, warm-toned, with a filmic quality that distinguishes the images from the over-processed look of heavy Lightroom edits. The value is in consistency rather than technical capability: applying the same VSCO preset across a tour’s images creates a coherent visual identity that makes a blog or Instagram feed look deliberately curated rather than randomly assembled.
Understanding the Basic Editing Controls
Exposure and Light
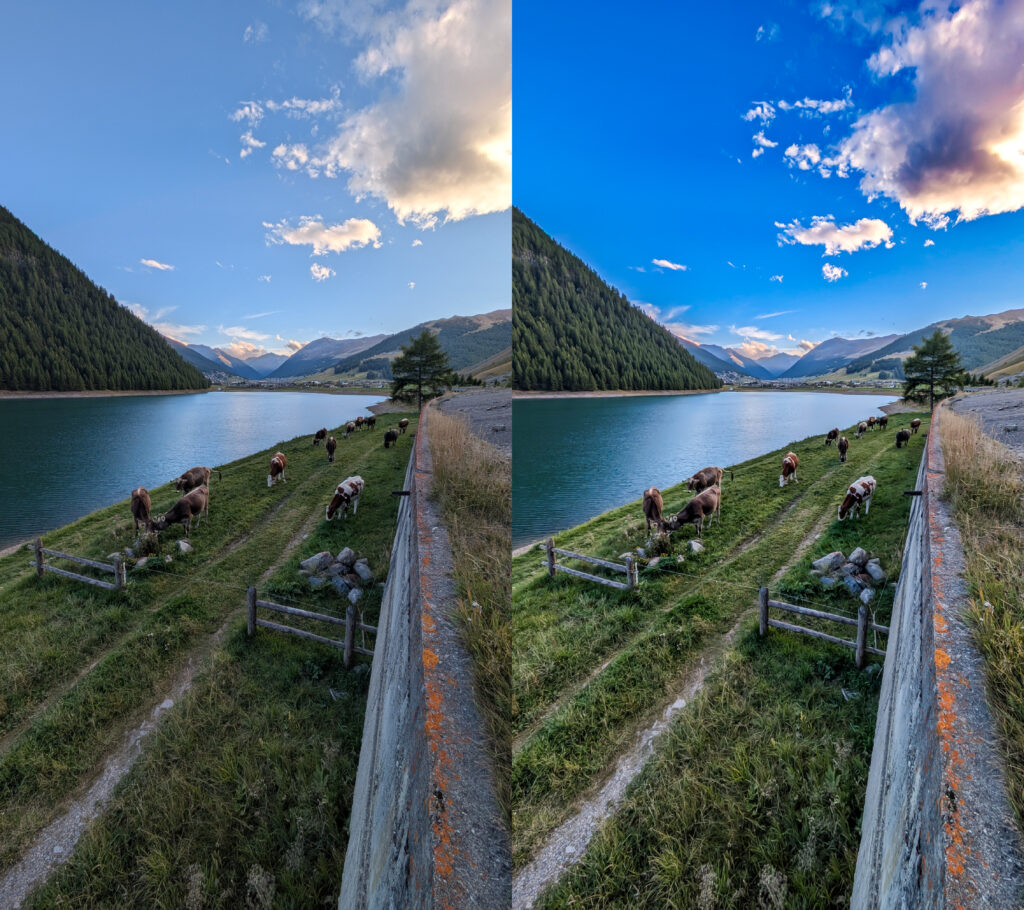
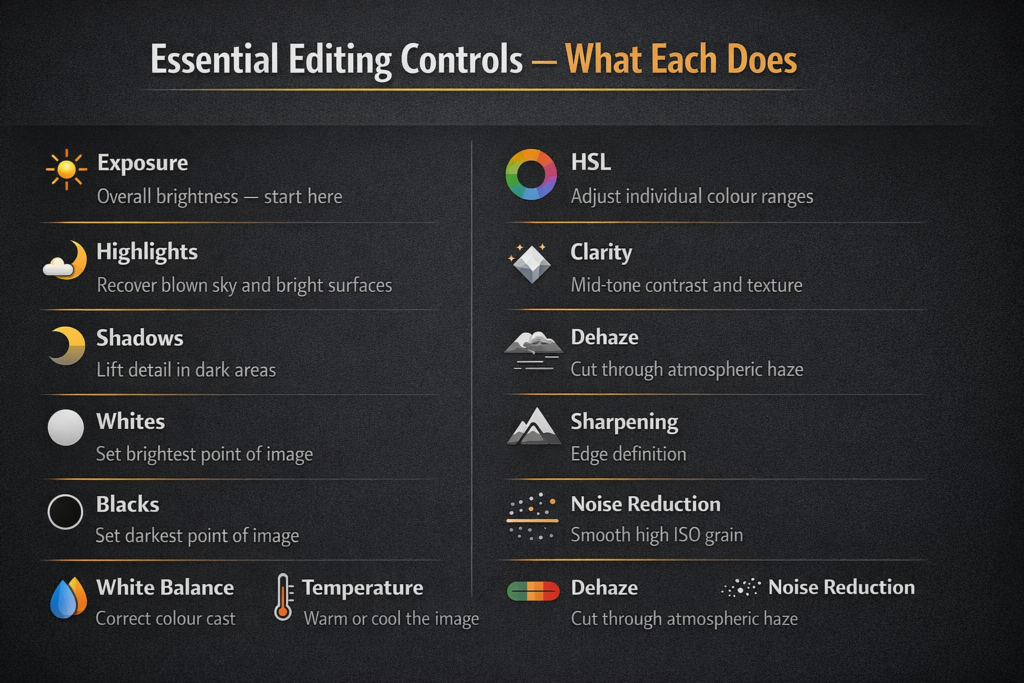
Exposure is the starting point for every edit — getting overall brightness to the right level before touching anything else. The most common mistake in editing motorcycle travel photos is over-brightening: an image that looks good on a phone screen in a dim guesthouse looks washed out and flat on a calibrated monitor. Edit at moderate phone brightness rather than maximum, and err toward slightly darker rather than lighter.
Highlights and shadows are the most powerful tools for motorcycle travel photography specifically. Highlights down recovers blown-out sky — the most frequent problem in outdoor photography. Shadows up lifts detail in dark areas: under helmet brims in portrait shots, in canyon shadows, in the interior of forests. Used together they expand the tonal range of the image toward what the eye actually perceived at the scene.
Colour and White Balance
White balance corrects colour cast introduced by different light conditions. A shot taken in open shade has a blue cast. A shot taken under tungsten light indoors has an orange cast. Correcting white balance is the single adjustment that most quickly makes an image look natural rather than processed. In Lightroom Mobile, the temperature slider warms or cools the image; tint adjusts green-magenta balance, which is rarely needed outdoors.
The HSL (hue, saturation, luminance) colour panel is the most precise tool for editing motorcycle travel photos with specific colour problems. Making blue skies deeper without affecting the rest of the image, enhancing the turquoise of a Balkan river without making it look artificial, pulling back oversaturated green foliage — all of these are HSL adjustments that global saturation sliders can’t achieve cleanly.
Detail and Sharpening
Sharpening adds definition to edges and textures — road surfaces, tyre treads, mountain rock faces, fabric detail in riding gear. The correct amount is less than most beginners apply: zoom to 100% when sharpening and stop when edges look defined rather than crunchy. Noise reduction smooths grain introduced by high ISO shooting in low light, and the balance between sharpening and noise reduction is the central tension of post-processing detail work.
Clarity adds mid-tone contrast and texture — useful for making road surfaces and rock faces feel more tactile, less useful for portraits where it emphasises skin texture unflattering. Dehaze cuts through atmospheric haze on mountain and coastal shots, recovering colour and contrast lost to distance and humidity.
Specific Editing Techniques for Motorcycle Travel Photography
Making Mountain and Canyon Roads Look Dramatic
The leading line of a road disappearing into a mountain landscape is the defining image of motorcycle travel photography and the one most worth editing carefully. Contrast and clarity on the road surface itself — using a selective brush or graduated filter rather than a global adjustment — enhances the leading line without over-processing the sky or surrounding landscape. Shadows up in the road foreground, highlights down in the sky, clarity increased selectively on the tarmac surface.
Sky drama comes from restraint as much as adjustment: highlights down recovers cloud detail, blue HSL saturation increased slightly deepens the sky, a graduated filter darkening from the top edge adds weight to the upper frame without looking artificial. The split tone technique — warm shadows, cool highlights — adds a cinematic quality to mountain shots that works particularly well in golden hour and overcast light.
Coastal and Water Shots
The distinctive teal colour of Balkan rivers and the deep blue of the Adriatic are the shots most worth editing carefully and the ones most easily over-processed. The HSL adjustment for aqua and blue — saturation up slightly, luminance down slightly — deepens water colour without pushing it into the artificial range that marks amateur editing immediately.
Horizon straightening is essential for coastal shots and easy to overlook in the editing flow. A horizon that’s one degree off level reads as wrong immediately even when the viewer can’t identify why. Check every coastal and water shot for level horizon before exporting.
Golden Hour and Low Light
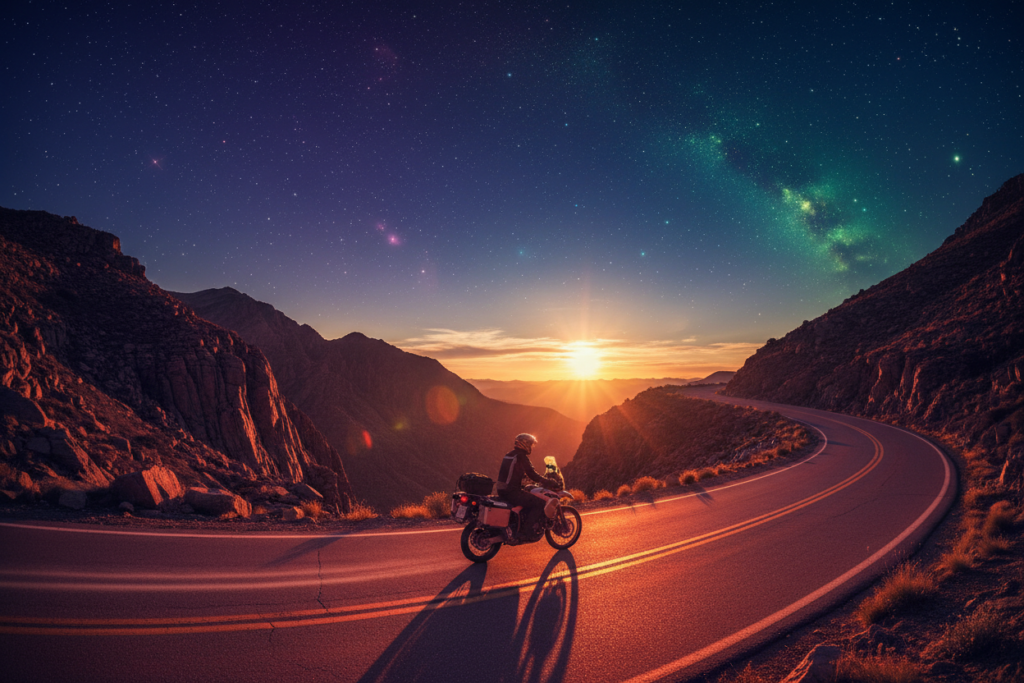
Golden hour images need less editing than any other lighting condition — the light is doing the work and heavy-handed editing destroys the warmth that makes the images compelling. The most common mistake is cooling the white balance toward neutral, which removes exactly what makes a golden hour shot golden. Protect the warm tones, lift shadows slightly, add a small amount of clarity to foreground texture, and stop.
Low light and night shooting requires noise reduction as the primary adjustment. The balance between smoothness (noise reduction) and detail (sharpening) is more critical in low light than any other condition. Err toward smoothness for backgrounds and distant elements, preserve sharpness on the subject — the bike, the helmet, the rider.
Editing Self-Portraits on Tour
Self-portrait editing for motorcycle travel photography requires protecting skin tones while enhancing the environment around the subject. The HSL orange channel controls skin tone — reducing orange saturation slightly produces more natural skin in warm light without affecting the surrounding landscape. Helmet and gear detail benefits from clarity and texture increases that look wrong on skin but excellent on fabric and hard surfaces.
A honest note before moving on: photo editing is one of those skills I’m actively developing rather than one I’ve mastered. The techniques above represent what I’ve learned through trial and error across multiple tours — some of it from other photographers, some from simply experimenting with images until they looked closer to what I actually experienced on the road. If you’re at the beginning of that process, the most useful thing I can tell you is that consistency matters more than complexity. One app, one preset, thirty minutes in the evening — done repeatedly across a tour — produces better results than an elaborate workflow used twice and abandoned.
Building an Editing Workflow on the Road
The evening workflow that works for most touring photographers: cull first, edit second, back up third. Culling — deleting the obvious rejects before editing anything — prevents wasted editing time on images that won’t be used and keeps storage manageable across a long tour. Delete anything obviously out of focus, badly exposed beyond recovery, or compositionally irrelevant. Keep everything that has potential, including imperfect shots with strong content.
Batch editing with presets covers the majority of images efficiently — apply the base preset, make three or four individual adjustments for the specific image, move on. Reserve detailed editing for the two or three images per day that genuinely merit it. A touring editing session should take thirty minutes on a normal day, not three hours.
Storage and Backup While Touring
The three-copy rule — original file, edited version, cloud backup — applied consistently across a tour prevents the catastrophic image loss that occasionally ends motorcycle travel photography careers. Google Photos provides free unlimited storage at compressed quality, which is sufficient for social media and blog use. Adobe Cloud syncs Lightroom edits and originals across devices. iCloud works seamlessly within the Apple ecosystem.
Local backup on a small portable SSD — 250 GB fits comfortably in a jacket pocket and weighs almost nothing — provides insurance against connectivity loss in remote areas. The combination of cloud backup where connectivity allows and local SSD backup as the baseline covers all realistic touring scenarios.
Mobile data costs across Europe vary significantly. Within the EU, roaming charges are regulated and data used at home rates in most cases. Non-EU Balkans — Albania, Kosovo, North Macedonia, Bosnia — require local SIM cards or international roaming packages for affordable data. Plan the backup strategy around connectivity before entering areas where cloud upload isn’t viable.
Sharing and Publishing on the Road
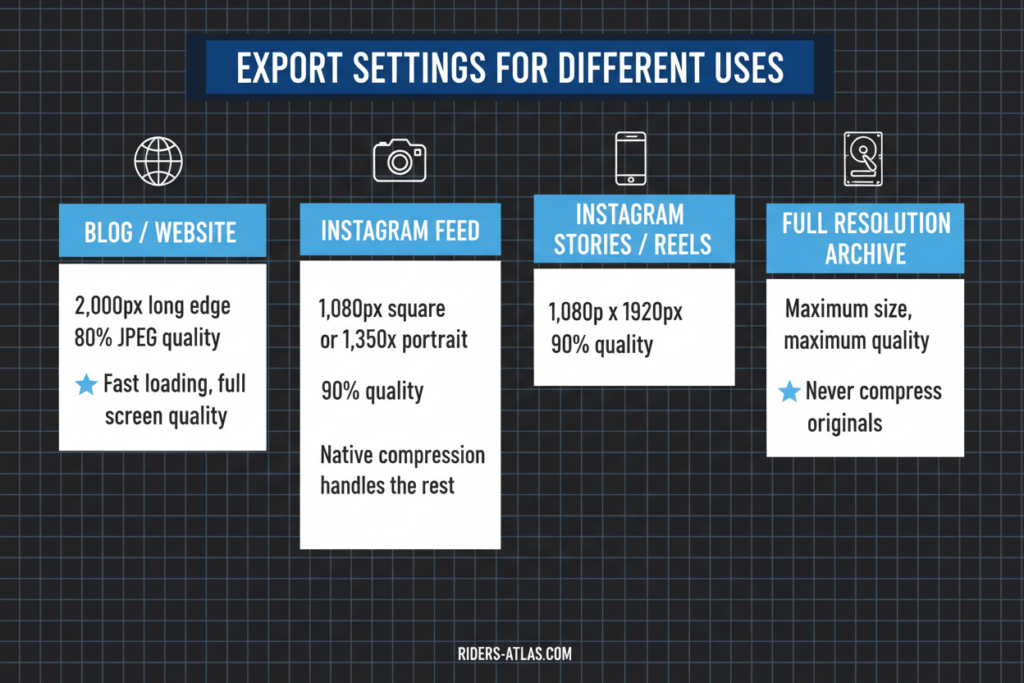
Exporting edited images for blog use: 2,000 pixels on the long edge at 80% JPEG quality produces files small enough for fast page loading while retaining quality sufficient for any screen size. Social media exports can be smaller — Instagram’s native compression makes files above 1,080 pixels largely redundant for feed posts.
Adding captions and location metadata immediately after editing while memory is fresh produces better caption writing than attempting to reconstruct context weeks later at home. Lightroom Mobile’s metadata fields accept location, caption, and keyword data that transfers directly to desktop if syncing.
Final Thoughts
Editing motorcycle travel photos on mobile has closed the gap with desktop editing to the point where the workflow distinction barely matters for most touring photography use cases. The technology is capable. The apps are mature. The constraint is time and discipline — thirty minutes of consistent evening editing across a two-week tour produces a finished, backed-up, shareable image library by the time you get home.
Start with Lightroom Mobile and one preset you’ve built for your own shooting conditions. Add Snapseed for selective adjustments. Keep the workflow simple until it’s consistent, then add complexity where it genuinely improves the results.
What’s your current mobile editing setup on tour and what would you change about it? Drop it in the comments — there’s always a rider about to start their first serious photo workflow who’ll benefit from knowing what actually works on the road.